Thursday, March 17, 2016

Introducing Iris

On January 14th, 2016, I was 39 weeks pregnant. I had very little complaints about being pregnant. I wasn't too overly tired of being pregnant. I awoke that morning with a lot of pressure. Not contractions, but it just felt like she was going to fall out of me. My doctor had be asking me for weeks how I was still walking because she was so low so I just thought it was nothing. Zack went on to work and I kept having weird feelings, but really did not think that I was even in early labor. I cleaned the bathroom, kept in touch with my doula, and rested because if today was the day I wanted to be on my A game. Zack kept in touch and told me to go ahead and call my mom and let her know how I was feeling. I assured her that I thought it was a false alarm, but she decided to go ahead and head down. I went about my day. Still no contractions, but a lot of pressure. Zack got home from work and mom arrived after around 6 pm. I unpacked her truck, got her bed set up, ate some chili, showered, and then watched some TV. Around 9:00 I went on to bed. Mom did as well and Zack, also convinced that nothing was happening, stayed up. An hour later, I woke up and the sheets were wet. "Okay," I thought, "my water broke. No big. Go tell Zack." I was pretty calm about it because I knew that labor still could take a while. Zack and I changed the bed sheets and talked to our doula. I also called the doctor who said I should come on in to the hospital. I did not want to do that at all. I wanted to be at home for as long as possible. So I ate a bite, drank some red raspberry tea, and sat on the birthing ball. About an hour or so later, Zack told me he would feel more comfortable if we went on to the hospital. I respected that, so we loaded up. Mom decided she would stay and get some sleep.

We had about a 20 minute drive. I was still not really having contractions when we left, but when we were about 5 minutes away from the hospital, crossing the river, I felt my first contraction. I told Zack to park far away because I wanted to walk. We had to enter through the emergency room entrance, and wouldn't you know it, but there was a hearse parked out front. That really helped my anxiety about hospitals... We checked in and they made me ride in the wheelchair. As I was being pushed down the hallway; out wheeled a body covered up, headed for the hearse... Wonderful. Zack kept reassuring me and I calmed down. They got us into the room and said they had to check me before they could really admit me. I consented, and I was already at 6 cm! Things were rolling! Contractions started to pick up. Natalie, our doula arrived as I was being hooked up to the I.V., for a dose of antibiotics, and the monitor. I wanted the wireless monitor so I could move around and get in the shower. The nurse said she didn't even know where that was, and when they did find it she couldn't hook it up. Once they did get it hooked up, they then told me that I couldn't get it wet (which I'm pretty sure is false) but that I could be unhooked from it for 10 minutes at a time to get in the shower. I was starting to get pretty uncomfortable at this point but refused to lay in the bed. I leaned over the foot of the bed while Zack and Natalie rubbed my back and encouraged me. I got in the shower and that was an amazing relief.

We kept the pattern of shower and leaning over the bed for about 2.5 or 3 hours. I was not able to talk through contractions anymore and I wasn't even feeling a break in between. I remembered reading in Ina May's Guide to Childbirth that sitting on the toilet helps relax you pelvic muscles and will in turn help dilation. That's where I sat. Then, I realized that chili was a bad choice for dinner because it's not comfortable coming back up. Natalie encouraged me while I was puking telling me that she was confident that I was in transition and to keep "mooing" through the contractions. I told Zack "I can't do this," but he assured me I could. I was feeling pushy. Natalie told the nurse this and she said she had to check me before they called the doctor in. I did not want this at all. Zack told them that, but I was feeling the urge so much that I agreed. I was 9.5 cm. I got back up and 10 mins later I told them they better get the doctor that I was pushing. The nurse told me to wait for the doctor as like 6 more people entered the room.

Zack sat behind me and I leaned against him upright. Natalie was on my right helping me support my legs. The nurse or doctor one asked me how I was feeling and I politely told them that I felt like I was having a bowel movement (I can't believe I didn't say "I need to take a shit!!!"). Doc was there. I was pushing. I believe it was like 3:45 am on the 15th. There was this one nurse who was standing to the right of me who kept asking Natalie if I was pushing and then telling me that I had to push. I not so politely told her to be quiet. I don't think I ever screamed like they show in movies. I had always said I wanted to be as calm as a hindu cow, so I was mooing...pushing...mooing. Fifteen minutes later, at 4:01 am on January 15, I mooed Iris out into the world!

We delayed clamping her cord until it was done pulsating and then we were skin to skin, the best feeling in the world. We stayed like this over an hour. Iris weighed 6 pounds 7oz and was 18 1/4 inches long. All was perfect.


Although I didn't want a hospital birth, it could not have gone any better. I am thankful for my fast, natural, intervention free birth, and most thankful our beautiful Iris Riley.


Wednesday, July 29, 2015

Who can add a single hour to their life by worrying?

No one can. So what's the point???

I am currently 15 weeks pregnant with Homestud and I's first child. We are beyond excited, except for the vomiting and severe headaches I am still experiencing. Last week, I was pretty much bedridden; unable to keep any fluids down and nothing was helping. Wednesday I went in for an IV but refusing any other medication. The constant sickness left me drained, physically and emotionally, leading me to the decision to resign from my seasonal position as a Field Tech (working outside in 110 degree weather). 

So my income is gone. We were prepared for this, but we were not prepared for our $3000 fridge to go out the next week. Seriously folks, don't ever buy Kitchenaid appliances. DON'T DO IT! This is the second time this has happened. 

But, this is life. I cried a lot and honestly Homestud and I fought about it (now I don't really know what we were fighting about). We have a backup in the basement. So what? It's an inconvenience. 

Life will go on. Food will be in our belly (maybe non refrigerated food) and there will be a roof over our head tomorrow. We have been lucky with an abundant cherry tomato harvest and we consistently have eggs. So why worry? This is life on a homestead.
Enjoy the little things. Like baby tomatoes. 

There will likely be a lot more committed to this site now that I'm "unemployed" so stay tuned!

Thursday, August 14, 2014

By God, I'm gonna look good doing it.

Here on the homestead, we do a lot of dirty chores. Cleaning up brush, gardening, working on chicken coops, etc are things you can find us doing almost every weekend. For such nasty things, certain clothes are usually worn. Nearly every weekend you will probably find me in my green arborwear pants, an old t-shirt, boots, and a ball cap. This is necessary for safety sake and because I don't want to tear anything up.

Homestud got me these for a wedding present as well as the belt buckle.

I usually look something like this...
Homestud usually looks something like this...

And so this is our weekend attire... Functional, because that is what is required. On top of the weekend garb, I typically wear my arborwears, or work clothes during the week. I've been interning with the US Forest Service and even though I've been doing a lot of office work, I want to be prepared to go into the field at anytime. During the fall, I will be working with them again once a week in the field, so long pants, boots, and a hat will be my go to again. 

So Kait, where are you going with this??? I love work. I love a good pair of work pants and gloves, but at the end of the day, I'm a lady. Yes, yes, this may come as a surprise, but I love dresses and pretty things, but sometimes, my lifestyle does not allow for such attire. I've been going through this mindset of, "You're not feminine. You look like a man. You don't have sex appeal." I want to feel like a pretty lady damnit! So even though a lot of times wearing a dress and cute shoes is not an option, I'm going to try to wear something feminine and pretty on days where I'm not going to be up to my elbows in chicken crap, fighting with poison ivy vines, or putting in plots in the forest. On days like today when house and cooking chores are on my agenda I will look like this... 
How do people have time to take so many selfies all the time... It's hard! 

A dress and an apron to protect said dress from all the kitchen crud and dirt... It's a win win situation. Who knows, maybe I'll get ambitious and put on some makeup. I'm a lady damnit and I want to look good. Not for anyone else (even though I'm sure Homestud appreciates it), but for the shear fact that it makes me feel good. This has become a goal of mine. I encourage any other ladies out there who live in work clothes, who do like dresses and the such, to make it a goal to put on something feminine at least for a few hours a week. At the end of the day, do what makes you happy. Do what empowers you, and don't do it for anyone else.

Monday, July 28, 2014

Mind your own business and work with your hands

My husband and I had pretty different upbringings. He grew up in a fairly high population setting surrounded by a lot of money. Not local politician or Bill Gates money, but that kind of strong middle class, disposable income, that you don't see anymore. On the other hand, I grew up in pretty rural middle America. We didn't have to scrape by and we never went without, in fact we were able to go on vacations every once in awhile, but a disposable income was not even really on my parents radar when my brother and I were growing up. We just didn't live in almost luxury like my husband did.

These different backgrounds make homesteading hard because his ideas require a capital investment that we don't have the money for. In fact, many of the ideas I have require an investment that just cannot happen without months of planning and saving. As Zack puts it, he funds the homestead, I keep it together.

For the past few weeks we have been discussing what I will do next semester while I finish up my degree. I could go back to a part-time minimum wage job, or I could stay home, while I'm not in class, and produce what I can. This has not been a easy decision and it has not been made without judgement and others strong opinions.

Zack and I have both agreed from the get go, that if and when we have a kid that I will be staying home for it's infancy, if not longer. This seems to boggle peoples' mind because the idea of a parent not working for a few years is just out of this world nowadays. But many of these types of people, were raising kids during a time when child care was not outrageous and work was easier to find. Not to mention many were also blessed to have their parents nearby to watch their children while they worked, because a stay-at-home-mom was pretty dang normal. We likely will not have these things, Zack's parents work, and my mom lives 7 hours away.

I'm not sure that one of us quitting a job all together will happen (because we like trips too much) but one of us working a job less, is definitely something that we value and will implement. Cutting out the dependency is something we want. Making money is not always the answer. I don't really know where I'm going with this, other than saying; you live on what you make. Work with your hands, consume less, and produce more. Figure out what you can do without and what you are not willing to give up. Come up with a happy median of making money and cultivating your family or dirt. Do what you think is best for your family and don't give a damn what others think because you know what is best for your situation.

"Let us not become weary in doing good, for at the proper time we will reap a harvest if we do not give up."

"Make it your ambition to lead a quiet life, to mind your own business and to work with your hands, just as we told you, so that your daily life may win the respect of outsiders and so that you will not be dependent on anybody."

Friday, May 30, 2014

It's probably the kraut in me...

I love all things cabbage. Sauteed, roasted, raw, fermented... This love must be passed down from my Oma (my German grandma). We have been getting beautiful heads of cabbage in our weekly CSA share and since I love putting away and preserving foods, I figured some sauerkraut was in order.

Packed full of probioticts and vitamin C, sauerkraut can easily provide some nutrients and vitamins that many of us need. Sure, you can buy high quality kraut in the store, but making it yourself is simple and the result tastes much better.

First, you will need one head of cabbage, one or two clean jars (depending on how much cabbage you have), a sharp knife, and salt (you can also add caraway seeds if you have some). I use my Oma's kraut cutter that's probably like a thousand years old or something, but a knife will work just fine.

Remove the outer leaves, but save one for later. Cut the head into fourths. 


 I guess if you are using a knife you don't really have to slice it into fourths, but if using a mandolin or fancy kraut cutter it does make it easier to handle. Slice the cabbage into fairly thin strips and add to a large bowl.


Once everything is sliced add about 2 tablespoons of salt.

Next, the cabbage gets a nice massage. Start squishing the cabbage and salt in your hands. It will start to wilt and get watery. This takes awhile around 5 minutes or so. Keep working it.


Once you start to get all this foamy liquid stuff it's ready.

You want to make sure the cabbage is fully submersed into the liquid. If it's not, the kraut won't successfully ferment and mold could start to grow. Start adding handfuls of the cabbage into a jar. Mash it down very tightly. I found a muddler for making cocktails works really well.


 Pour any excess liquid into the jar. You should have this foamy fizzy stuff at the top.

Take one of the outside leaves and put it over the liquid and cabbage. This will help to weigh everything down so you get proper fermentation. 

Cover the jar with a cloth or paper towel. Secure with a rubber band or jar band. It is important that it is covered with something that allows air flow.

Let it hang out in a dark corner for a little as 3 days or as long as you'd like really. Check on it every day or so to make sure everything is submerged. The longer it sits, the stronger the flavor. Enjoy it on some brats, hot dog, as a side dish, or just eat spoonfuls of it!


Tuesday, May 20, 2014

Dimes and Dollars

This is a very touchy subject... money. It is the root of all evil, but seems to make the world go round. In 2012 a Gallup pole reported that the average American spent an average of $151 on food per week. Food, is a subject that Zack and I have decided not to skimp on because it is the core of health and well being (not to mention good food tastes darn good). Someone said something to the two of us that really got me thinking about the amount of money that the two of us spend on food each month. They said, "I don't have the money to be a food snob like ya'll." This was said in a jokingly manner but the wheels started turning in my head. How much do we really spend on food each month? Are we below average or above?

Produce:
For most of the year we are members of a CSA. Each weekly distribution of local organic produce comes out to be about $20 per week. On top of what I grow and put away we really don't buy much produce in the store.
$20x4weeks= $80 per month
Weekly CSA share

Dairy:
I buy Daisy sour cream in store. There usually isn't an organic option so I go with Daisy because it is just cream and cultures, here it costs about $2 for a pound. I also buy cream cheese because it's a weakness of mine for $3.50. I normally go with Kerrygold butter with is about $4 a 1/2 pound, which usually lasts us close to a month. We don't drink a lot of milk, but when we do, it comes from the farm for $3 a gallon. Sometimes I will get cream from the farm to make butter, but I started doing the math and because this farm's cows do not produce a lot of butter fat, like a jersey would, the yield of butter from a gallon of cream is very low. It really come out to be more economical to purchase high quality butter from grass fed cows.
$4+$3.50+$3= $10.50 per month

Meat:
We bought a whole grass fed/no antibiotic cow about 2 years ago. If my brain serves me right, the whole thing with butchering a packaging end up being about $1200. We got close to 600 pound of meat (I think... I don't really remember but that sounds right). We got half and Zack's parents bought the other half. Zack and I eat beef probably close to 5 days a week and the half of a cow lasted almost 2 years. Zack's parents on the other hand, did not like the taste of the meat, so we ended up buying what they had left back from them. So we should have enough beef to last close to another year.
This one is tricky but I think it comes out to be: $1200/36months=$33 per month (roughly)
Our whole cow 


Ok. So that's a run down of what we purchase typically. Lets run some numbers:
$80 for produce
$10.50 for produce
$33 for meat
Total: $123.50 per month.

These numbers are not exact by any stretch, but it's a rough estimate of the bulk of what we buy and eat each month. Flour, sugar, and other staples were not really factored in because I buy those in bulk and that last me awhile. Also, the amount tends to fluctuate depending on the amount of produce we get each week and how much I grow. Since we also have the chickens we have not purchased eggs in the store for over 2 years. I'm pretty proud of this number considering that Zack and I have become "food snobs" and are really particular about what we purchase and consume. As my hero Joel Salatin put it, "“If you think organic food is expensive, have you priced cancer lately?” Nourishing foods don't have to break the bank. Small steps make all the difference. Joining a CSA can help to cut the cost of organic, buying in bulk, or having a small herb garden or a few vegetable plants in you flower bed are steps in the right direction in driving down your food bill each month and steps towards self reliance.

Wednesday, May 7, 2014

Cha cha cha changgeeesss.....

As you probably see, the name of this blog has changed. This was done to mark a new chapter in my life... I got married!
Zack and I got hitched in March. It was a beautiful 15 minute ceremony with a home cooked reception after. We wouldn't have done it any differently. And so begins the Heard Homestead.

In the homestead news this week: chickens, gardening, and and various other projects like my outdoor kitchen.

I started another garden plot this year to hopefully grow more food to put away. It's shaping up quite nicely. I decided to trellis my cucumbers this year, but because of lack of money and Zack working long hours I had to make one the the materials that I had laying around; some sticks, twine, and some lashing skills. This is what I came up with:
It's at a slant so I am able to grow some lettuces and greens under the shade of the vines if I so desire. I hope it holds up. I also built a totally vertical one for my sugar baby watermelons to grow on.

This is what is planted in the summer garden this year:
Blue jade sweet corn
Empress bush green beans
Burgundy red okra
Cucumbers
23 tomato plants of various varieties
Lots of jalapenos
Sugar baby watermelons
Sunflowers
Yellow crookneck squash
Zucchini
Eggplant
Sweet peppers

I'm really excited to see how the blue jade sweet corn turns out. It's a small heirloom variety that only gets to be about 3' tall. I hope it is as pretty as it is on the seed packet. I'm anticipating doing A LOT (more like hoping) canning and preserving this summer. We have been in the process of making an outdoor kitchen for some time now but with wedding stuff and work have not got it completed. Yesterday, I went and bought a 2 burner propane gas range and put it in place. Now all we need is to plumb the water hose into the sink. The counter and sink were given to us!!!

Not the greatest of pictures, but you get the idea.

We also have theses little babies and some teenagers down in the coop. We should have more eggs than we know what to do with come fall...

Those are some of the happening on the homestead... Things are shaping up!

Tuesday, December 17, 2013

The essentials

This Christmas season if you or someone you know is interested preparing real nourishing foods there are a few items that I have deemed incredibly important for a working kitchen. Get them. They will make your life easier! These are all items that I use almost daily/weekly in my kitchen.

1) Kitchen Aid Mixer

This bad boy was a dream of mine from a young age. My mom always told me she would get me one when I got married. But low and behold she got me one last year for Christmas. It's seriously the power drill of the kitchen. I also have the meat grinder attachment which has been a life saver!

2) Mason jars

I use mason jars for many different tasks. Not only do I preserve fruits, beans, sauces, you name it in it in the pressure canner, but I also freeze in them which is awesome for stocks and soups. They save money on plastic freezer bags and are much more sturdy than plastic tupperware containers. They are also live savers when you purchase stuff in bulk and just want to keep a smaller amount in your cabinets. I typically get mine from the dollar store.

3) Crock pot

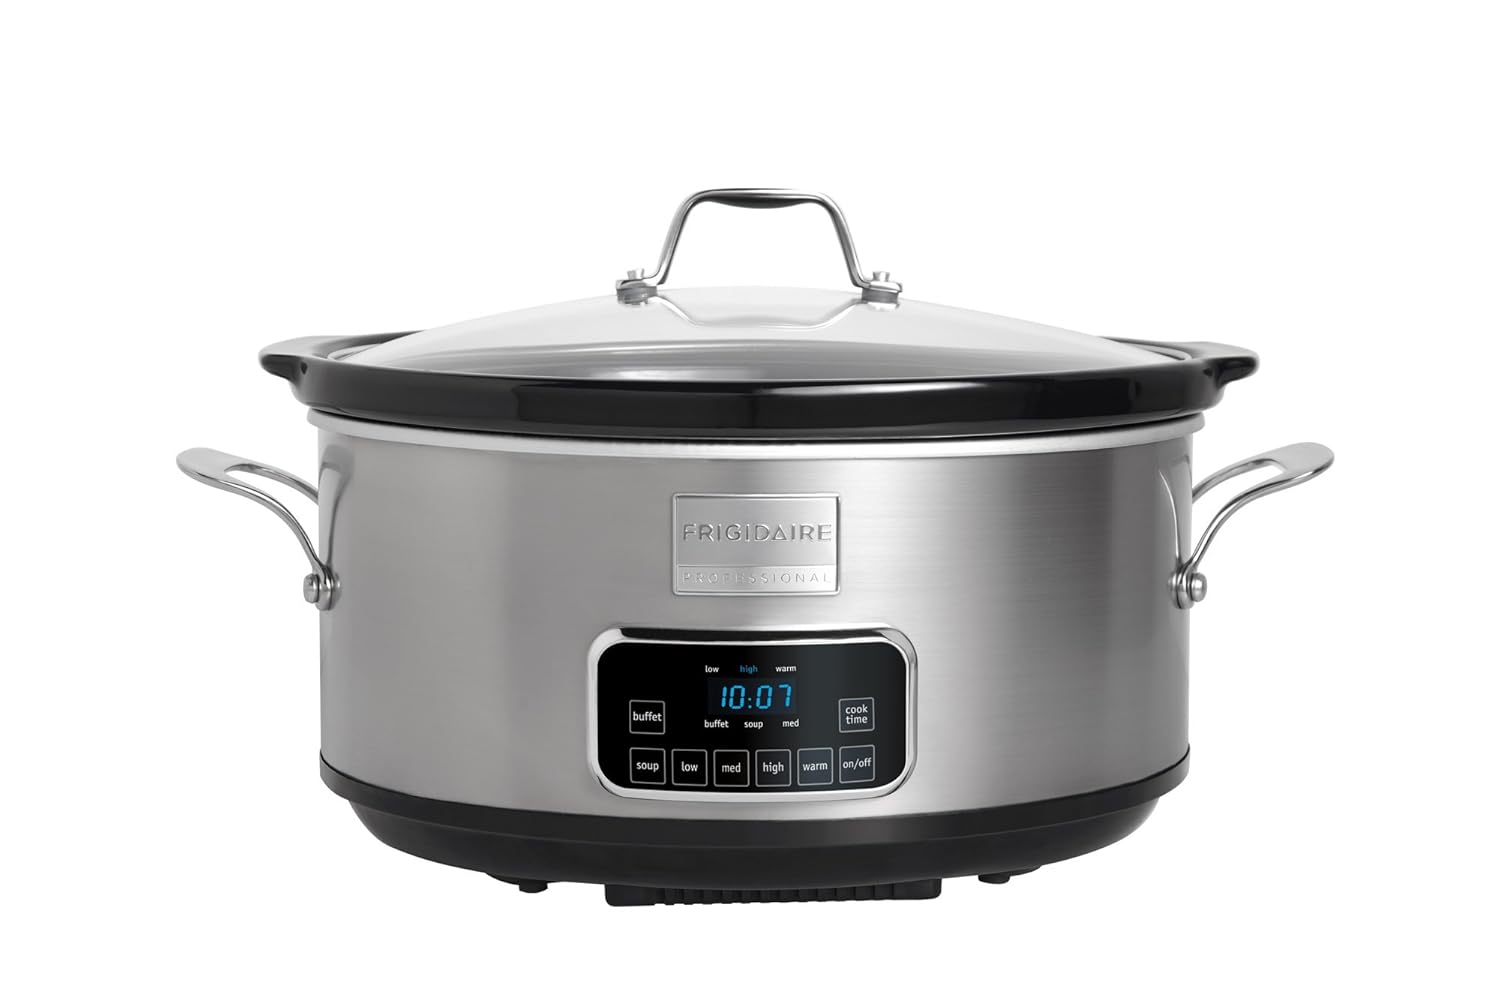
I don't know what I would do without one. As a working college student, planed ahead and fix it and leave it dishes are a God send. So being able so stick a roast in there or some soup fixin's in the morning, and coming home to dinner ready really makes my days go smoother. I have Hamilton Beach Stow and Go crock which locks the lid down for traveling. It's great for just that, but this one is on my wedding registry because I'm in need of a larger one. 

4) Good Quality Knives

This is actually on my wish list. When preparing real nourishing foods, you will find yourself chopping and dicing a lot of different ingredients. Sharp, high quality knives are vital to a working kitchen. I have a few that actually came from Sam's Club that have held a decent blade and are a nice weight, but these are some that I have been eyeballing!

5) Cast Iron

When I think of cast iron, I get all warm and fuzzy. I seriously cherish my collection and if you even mention putting them in the dishwasher, or get near them with soap, I will probably come at you and knock you across the head with one of my skillets......Harsh, I know, but I love them dearly. Heat retention is amazing in cast iron as well as the transferability to the stove top to oven. To me, food prepared in it tastes better. You also don't have to worry about nasty chemicals leaching into your food unlike when you cook with teflon. Also, iron. Traces of iron is added into the food which is a very important mineral, especially for women. Most people do not get enough iron. Cleaning is easy, just scrub them out and let them dry. Occasionally grease and salt them and you will have cookware that will out live you. Check out garage sales or your grandparents. Many people discard cast iron that is "rusted," but this can be fixed. 
I recommend having at least a 14in skillet and a 5-7 quart dutch oven which is perfect for soups.

So there it is. I've made Christmas shopping easier on ya'll!


Wednesday, November 6, 2013

Back on Track

Over the last few months, things have been slow here on the homestead. We have lost all but 3 of our chickens (none which are really laying) to a coyote. All of the chicks and even our rooster met the coyote. He will make a nice rug someday... The morning that we found the carcasses the coyote was still feast. As Zack and I were running into the house to get the gun, Zack landed funny on his foot and broke it. Never take mobility for granted. NEVER! Things have been put on hold for awhile because Zack is the main muscle of this operation. Now, almost 5 weeks later, we are getting back on track.

We have a new addition to the homestead... Forrest our 22 week old Great Pyrenees puppy. He will be our Livestock Guardian Dog to protect the chickens and the property from predators, someday that is. Right now he is just a snowball of energy.

The white one is Forrest... at 18 weeks when we got him he was already almost the same size as snick.

Also in the works is a 300 square foot fenced in area for both Forrest and the new batch of chickens that I get. Not only will this help give me peace of mind from the predators, but I will keep the chickens from digging up my flower bed and the grass seed that we are trying to sprout!

Lets hope and pray for some better luck over the next few months!

Tuesday, August 13, 2013

The chicken snatching of 2013....

Zack and I went to my mom's house this past weekend. When we got home we noticed that the rooster, 2 hens, and all 7 chicks were gone... We shook the food cup hoping they would come up, but none did. After searching the yard, I found one dead baby chick. No other feathers, no other evidence.... Mystery! I'll be honest, I cried and cursed a lot... Zack drank. If anything was going to eat those birds it was going to be us. In fact, that was the plan. But instead, they have mysteriously disappeared. In ways, I feel like a failure, but really, loss is part of it. Now, I just have to be thankful for the few eggs that I still have fertilized and hope and pray for a successful hatching (more on that later).

Also, a new coop is now quickly in the works. Something cheap, easy, and somewhat attractive. This one is made from pallets!


With school starting back up, oh, and a wedding to plan, we need to go ahead and tackle this stuff soon... Like yesterday! But hopefully all will work out and we will not fret over our failures and mishaps, but be thankful for the learning experiences and bounty that we are receiving. 

Now... I'm going to purchase some seeds!

Friday, July 26, 2013

I'm done with summer!

I'm very frustrated with my garden. This is what it looked like about a month ago. Green full, productive.
Now its a wilted mess. It makes me sad.
I had one harvest of yellow squash before plant death/disease something, a handful of cucumbers, no beans yet, and a few pounds of split tomatoes. It's been very very wet here for an Alabama summer so I think a lot of the plants don't really know how to react and it's giving way to a lot of pest problems... I don't think my sweet potatoes are very happy either because of the cooler temperatures we have been having. So in light of all this summer crop failure, I am thinking about my fall garden. I'm dreaming of cabbages, kohlrabi, kale, chard, collards, potatoes, and carrots.
This is what I go off of when I start planning the next round of crops. A Facebook friend asked about when to plant what so this is a really good start.
http://www.aces.edu/pubs/docs/A/ANR-0063/ANR-0063.pdf
Not only does it help you know when to plant, but what varieties are productive in Alabama.

Monday, July 15, 2013

Blueberries!

Zack and I went out to an organic farm yesterday to pick blueberries. We came back with 2 gallons of berries! I'm kind of in a squirreling mode right now trying to pack away and preserve all of the summer goodness into jars and in the freezer. So, not only am I going to freeze some berries for smoothies and pies for later, I decided to bust out the water bath canner and make some preserves.

Blueberries are amazing things. They have a mind of their own to bounce all over the kitchen and they are full of amazing antioxidants (that have been studied to reduce the risk of cancer), they are packed with vitamin C, fiber, and very low in calories. So these preserves are going on everything... Pancakes, PB&J's, and maybe even made into a BBQ sauce.

This was not very difficult to do, just very messy. I stained a pair of shorts and had squished berries on my floor. I ended up with 11 half pint jars of preserves. I may get ambitious tomorrow or so and do some more.

I started with about 12 cups of fresh berries.
I filled up one side of my sink and poured them in... This not only washes them, but helps me to see all the little stems, bugs, whatever that are hanging out with the berries. Move your hands through them and start putting them into a colander

After you have accomplished this, fill up your water bath canner about half way. Start the boiling processes. In the mean time, wash your jars, lids, and rings in hot soapy water. Get a big pot out for the berries. Put a sauce pan with enough water for your lids and bands on the stove top on medium heat. Once you have all the canning stuff in line it's time to mash the berries. You can do this in the food processor, but I already had a pile of dishes so I opted to do this the old fashioned way. 

For all of the family out there, this is Oma's masher thing to the old food mill thing that was above the stove... 
You want to mash them up quite a bit, but you also want to leave some good chunks... Also, feel free to use your hands. Honestly, it might be the best way. Once mashed, add the berries to that large pot we talked about. Turn on the heat. Once the berries start to bubble a little add about 4 cups sugar... I used a dark unprocessed organic pure cane but any will do (I also did less sugar, because that kind is a little on the expensive side). I also added around 4 tablespoons of local honey and the juice from one lemon. Let this start to bubble and get a nice purple foam on top.

Now it's time to sterilize your jars. The water bath should be boiling... Gently lower the jars in and let them hang out for a bit. 

Since I'm not using any pectin in this recipe, the mixture has to cook long enough to start to gel. This is tested by putting some of the juice onto a saucer, allowing it to cool, and running your finger through it to check it's thickness.
Once you can run you finger through it and not have it try to run back together it's ready to go into the sterilized jars. Folks, do this on an old towel... Even with a food funnel it makes a hot mess. Fill jars leaving about 1 inch of headspace. Clean the rims of the jars, center the lids, and hand tighten the bands. Your water bath should still be boiling so place the jars on the rack (I was able to do 8 half pint jars in my canner) and gently lower them. Process for 15 minutes.  
I kind of got distracted and forgot to take pictures of all of this. 
Once the time has gone by, remove the jars with the jar lifter things and place on a towel in a draft free area. You should start to hear the "pings" of the jars sealing. These are the outcomes. 
I'm pretty excited about trying these... 

I know this isn't the best tutorial to water bath canning. For a complete one go here. They are doing tomatoes, but you can use this method for anything that's high in acidity. 


.

Thursday, July 11, 2013

Beef heart... It's what's for dinner.

I told Zack last night while preparing this meal that I didn't want to share the goodness that is beef heart to everyone... But I changed my mind because people shouldn't be afraid of organ meats, the heart especially. Not only is it very very VERY tasty, it's also very good for you. It's about 68% protein, very high in iron (which is good for you ladies), high in vitamin B12 (which supports healthy nerve and blood cells), and low in fat. Not to mention, it's also one of the biggest and cheapest cuts of meat there is!

Here it is... In all it's anatomic glory. This heart I purchased from the Harvell's Black Angus Beef at the farmers market. This chunk of meat was $4.50!

To prepare, it is advisable to trim off the hard white cartilage fat stuff... I'm not really sure exactly what it is.


A good sharp paring knife will do the trick. Next, I cut it in half. This is not necessary, but you are able to get a good sear on it in smaller pieces. Now you can see all the ventricles and arteries... If this grosses you out feel free to trim them out. 


I seasoned them with a good amount of black pepper, salt, and garlic. While you heat up a big cast iron skillet with oil and about 2 tablespoons of butter (because it is a health food). That's my favorite skillet Big Bertha.
Once everything is good and hot, cram the two pieces in and allow to sear for about 10 minutes or so on each side. This is a big piece of meat so it could stand to go longer. Also, pre heat your oven to 400 degrees.

Sorry for the blurry picture.  I also added some onions in there for good measure. Once it's seared the way you like it put it in the hot oven for about 30 minutes. Once it comes out let it rest for however long you can wait and slice. I forgot a picture of when it came out, but heres one of Zack's dinner plate.


This is cooked about medium rare. Of course you can cook it longer. We had squash and eggplant as a side but mashed potatoes would have been awesome. We were only able to eat half of it so there is enough for lunch tomorrow. So that's $4.50 for 2 meals for 2 people! Talk about cheap eating. Heart is not tough nor does it have the typical "organ meat" taste. It tastes like beef. Embrace this folks...... wait don't..... I don't want the price to go up!